
Aussie Cob Loaf Sliders
This recipe will combine the humble party fave cob loaf and garlic bread into one!!

Aussie Cob Loaf Sliders With Leftover Ham
8
5 minutes
30 minutes
402
Australian
Sides
We all know after chrissy you have a shizer load of leftover ham. So what to do with it? line the "cob loaf" with it!
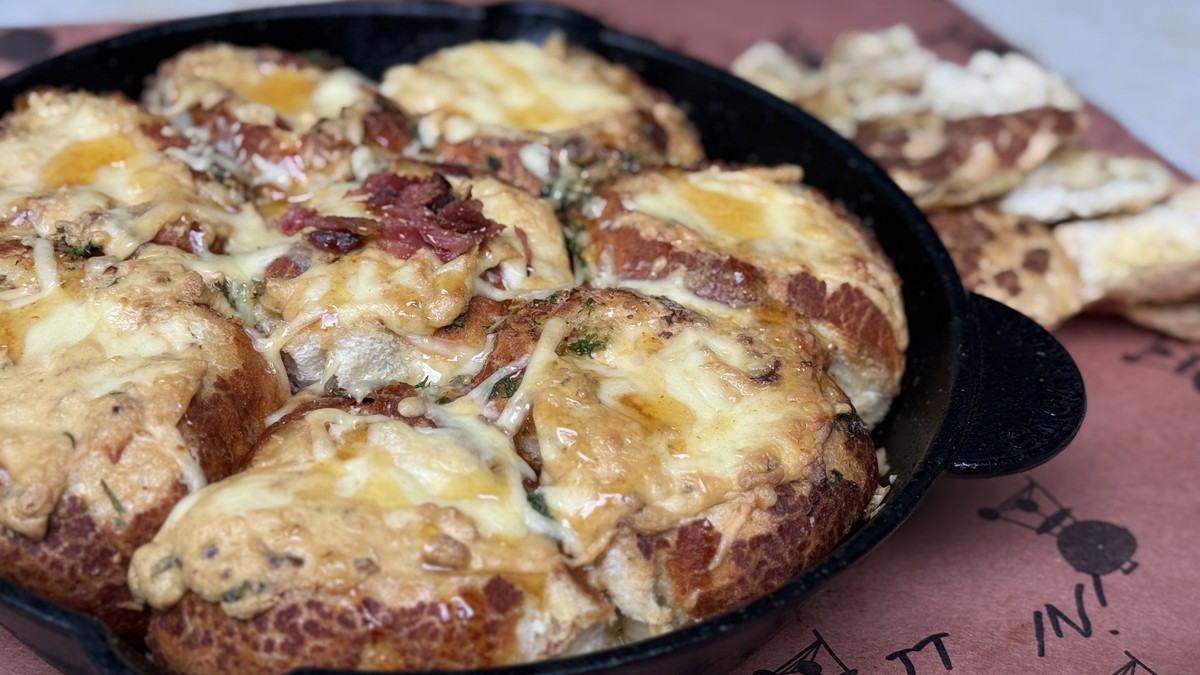
The dip is served in a crusty tiger rolls and the remaining bread that's pulled from the guts gets used for dipping. Here is where my recipe is a little different to most - you roll out the torn out bread so they resemble dipping chips. Then bake with olive oil, garlic powder and herb salt!
Fresh veggies like carrot and celery and crackers make a cracking addition.
Because this is all brought together in a cast iron frypan, this recipe can be used in a camp fire setting, oven, gas barby or in the home oven. I did this in my Weber Smoque pellet grill.
Equipment Needed:
- pellet smoker or oven
- bread knife
- cast iron pan
- mixing bowl
- spatula or spoon

Ingredients
- 8 tiger rolls (or adjust for your size pan)
- Hot honey
- Small handful of grated cheese to top
- Leftover Christmas ham sliced thinly
Garlic Butter
- 3 large cloves of garlic minced
- 2 tbsp of chopped parsley (any type)
- 150gm unsalted butter
Dipping Chips (from bread pulled out of rolls)
- Garlic powder or granules
- Grilld style herb chip salt
- olive oil
Cob Loaf Filling
- 2 tbsp HealthIER all purpose seasoning (or your fave AP rub)
- ¾ pkt French Onion soup mix
- 250gm tub of cream cheese
- 200gm sour cream (over half small tub)
- 2 stalks of spring onion sliced
- 3 tbsp pickle juice
- small handful of grated cheese (I used light cheese as this whole dish was going straight to my rear end, but mozzarella works best)
Directions
Cob Loaf Filling
In a pot on low heat add all filling ingredients, and stir through until combined.
Then turn down heat to the lowest possible and cover with a lid and move on to tiger roll prep
Tiger Rolls
Slice the top off and some of the innards and put to the side. Also use your fingers to push the centre of rolls flat, so you have a good vessel to pour in the filling later
Arrange the tiger rolls in the cast iron pan ready for the cooker
Place ham into rolls to act as a liner
Preheat your oven, baby or smoker to 180C/356F
Dipping Chips (bread guts)
Use a rolling pin to flatten the bread you pulled from the rolls, so they are approximately twice the thickness of a Dorito and bang them onto a baking tray
Drizzle them with olive oil, then sprinkle garlic powder and herb salt over the top
Place the tray into the cooker until slightly brown and crispy (should be ready in 20 odd mins). Remove them as soon as they are done, even if the sliders aren’t ready yet
Garlic Butter (for tiger rolls)
Add ingredients into small pot and bang that into your cooker until butter has fully melted
Now pour garlic butter all over the tiger rolls in your cast iron pan and place your cast iron pan with rolls into the cooker for 3-5 mins to slightly crisp up
Finishing The Cook!
Now you have the rolls in the pan lined with ham, garlic butter poured all over them and they have ever so slightly gotten crispy after a short amount of time in your cooker. As these were cooked in my Weber Smoque, I will get a faint hint of smoke through mine which is amazing!
Pour the filling mixture into each of the tiger rolls, then top with a little grated cheese
Cook for approximately 15 mins until they go golden on top and cheese has melted. Part way through if they are getting too crispy and the cheese hasn’t melted, cover the pan with thick alfoil until done.
Drizzle hot honey over the top
Now either use the garlic bread chips to dip into the cob load sliders, or just grab a whole slider and bang that down your neck hole! Be careful as they will be hot for 5 or so mins after you remove them from the heat.

1 comment
I have already started this recipe 😂 as I saw it in your IG stories!